Epic House Update #3: The Kitchen
Our blog has fallen woefully behind. So here’s our attempt at a massive “catch up” to bring our posts up to the present(ish) date! It’s basically a huge dump of photos with brief text explanations. Better than nothing, right?
We are happy to answer detailed questions so feel free to leave a comment or send us a message about anything here.
This is part 3 of 3, which covers the KITCHEN! Because the kitchen renovation was such a massive project, even doing a quick summary requires its own post.
For more updates, check out: Part 1: Skylight | Crawl space | Heating/Cooling | Wiring and Part 2: Drywall | Flooring | Lighting | Loft
Ready? Here we go… everything PLUS the kitchen sink! :)
Time to build a new kitchen! After we demolished the old one, we ripped out the ancient vinyl flooring and the layers below it until the subfloor was exposed. Here’s my brother Bin helping with the dirty work:
Since we were expanding the size of our kitchen (almost doubling it), Chris removed some of the adjacent original hardwood floorboards (don’t worry, we reused these pieces in the ceiling so they did not go to waste). Then he put down plywood as the base of the new kitchen floor.
Time to install the new linoleum flooring! This was Chris’ first time doing this so it was a little stressful, since you basically get one shot at installing it correctly (if it’s crooked you can’t exactly just pull it off and try again without ruining the flooring).
The linoleum is adhered to the plywood with special, goopy adhesive. Here’s Chris smearing the goop:
After the goop was applied, Chris had to oh-so-carefully lay the long linoleum sheet on top of it before it dried.
By the way, this is real linoleum flooring, a.k.a. made of linseed oil (not the vinyl stuff that most people think of when someone says “linoleum”). Chris chose to use authentic linoleum because it’s made of naturally sourced, more sustainable materials.
We chose a color called “vintage blue” — we think it looks light and cheery, and goes well with all the wood in the room.
Chris used a heavy roller (which he rented from Home Depot) to press the linoleum down firmly and evenly:
Looks quite nice!
After the flooring was put in, it was time for cabinets! Here’s half of our cabinets jammed into our Nissan Leaf (which turns out, has impressive capacity):
In true DIY fashion, Chris wanted to assemble the cabinets himself. It’s not a super complicated or technical process, but it’s very, very tedious.
Chris in a box:
One of the most tedious parts of assembling cabinets was making them all level and horizontally line up with each other. It turns out, floors are almost never actually flat! There are ever so slight imperfections and slopes present — so when you try to put straight-edged objects on them, they end up crooked.
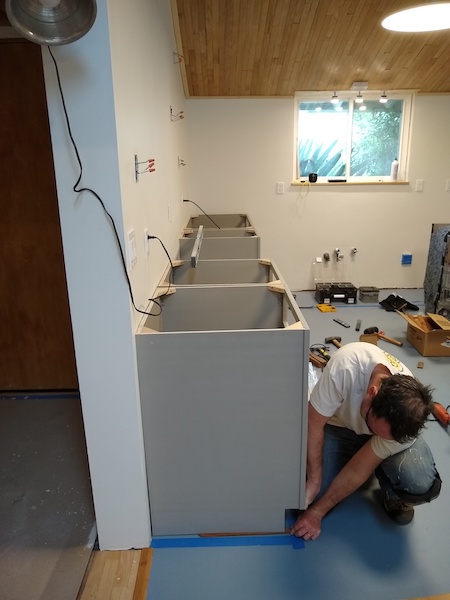
So Chris had to install shims under the cabinets, a.k.a. he stuck flat pieces of wood of variable thickness under each corner of each cabinet until they were perfectly level on multiple axes (Chris used up to 3 spirit level tools at a time to confirm this). There seems to be no real science to it, just trial and error (and persistence). Here’s a photo of him putting in a shim:
Happily, our friends Nikki and Lac helped out the with cabinets, which moved things along a bit and made it more fun:
And now we interrupt the cabinet installation process with big news! Our induction range has arrived! For our new 100% electric kitchen, we decided to swap out our natural gas range with an induction one. That means we no longer have to cook over an open flame (which produces indoor pollutants and uses fossil fuels), and instead get to cook using efficient, precise induction technology (powered by electricity generated renewably from our solar panels).
Despite how he appears below, I assure you Chris is super stoked about plugging in the induction range for the first time! He’s just annoyed that I’m making him take yet another photo. Look at that big beefy plug.
The kitchen isn’t even done yet (who needs electrical outlets or countertops?) but we were so psyched about the new range that we started cooking on it anyway. Here’s me cooking our first meal on the new cooktop! Soup time!
And here’s Chris testing out the new convection oven. Bread time!
Things are really starting to come together…
It’s unwise to cook without a range hood (the fan above the stove that sucks up pollutants from your cooking and spits it outside), so that was our next priority.
Here’s Chris installing our new range hood with help from our neighbor Hang:
Chris had the range hood vent outside straight through the wall, which happened to be right next to our front door:
Kind of awkward and quirky, but at least our houseguests will get an olfactory preview of what’s for dinner when they ring the doorbell!
Onward with the cabinets! Chris starts to tackle the upper units:
He also put in under-cabinet lights, to ensure that the countertops would be well-lit for food prep:
Finally, the cabinets are done! (Besides the handles and a couple doors, anyway.) Check out all the new kitchen lights, too.
Time to install the sink. First, Chris cut a hole in the plywood in the shape of the sink (using a rotary saw for the rounded corners):
He then used a router to cut out a groove for the lip of the sink:
Now the sink is snug as a bug, and ready for the countertop.
We purchased quartz countertops, and oh boy, were they a huge challenge to install! Mostly because stone is soooo heavy and difficult to work with. It was a big ordeal every time Chris needed to move a piece anywhere. It’s pretty much impossible for a single person to lift alone, so you have to have other people around to help, and you need to be very careful to not drop, chip, or crack the stone in transit.
Each uncut piece of countertop weighs about 200 pounds. Here’s Chris, Bin, Lac, and Johnny (4 strong guys) struggling to carry this single piece outside so it can be cut:
Chris cut the quartz using a wet circular saw with a diamond blade. It’s high-stakes cutting because if you cut off too much, the piece is ruined and you have to buy a whole new one. (Angled cuts are especially tricky.) So Chris triple- and quadruple- checked each measurement before cutting. It was slow, loud, wet, and messy:
Here’s a funny photo of the guys installing a new piece of countertop on one end of the kitchen while our friend Dan prepped food on the other end (we had a dinner party that night!). Who says you can’t work and party at the same time?
Thanks Lac, Johnny, and Bin! You guys are the best.
One of the hardest parts about installing the countertops was cutting the corners just right. As you can see, there is very little room for error:
The only solution is to keep cutting off a little more at a time until it fits snugly. But this is easier said than done, because remember, the pieces have to be cut outside (due to the water and mess), and each piece is super heavy. So schlepping the pieces inside and outside, cutting and checking, over and over, takes momentous effort and patience.
Here is a happy and exhausted Chris and Lac after finally getting that corner to fit! Great work, you two:
To fill in the seams where two pieces meet, Chris used epoxy. This suction-cup vice-looking thing held the pieces together while the epoxy cured:
Chris then sanded down the epoxy until it was nice and smooth. Ta da! A finished corner:
Speaking of momentous effort, let’s get back to the sink. Now, Chris’ task is to cut out a hole for the sink in the countertop. The hole has to be perfectly shaped like the sink and be in the exact right spot. If Chris is off by even a quarter of an inch, the whole thing is pretty much ruined. But no pressure or anything.
For this job, Chris decided to do the cutting inside so he could use the hole in the plywood as a reference (he was also worried about breaking the countertop by moving it in and out too much… a big hole would make it more fragile). This caused a big wet mess inside the house but he decided it was worth it.
First he used a rotary saw (with a diamond bit) and cut a crude hole inside the lines:
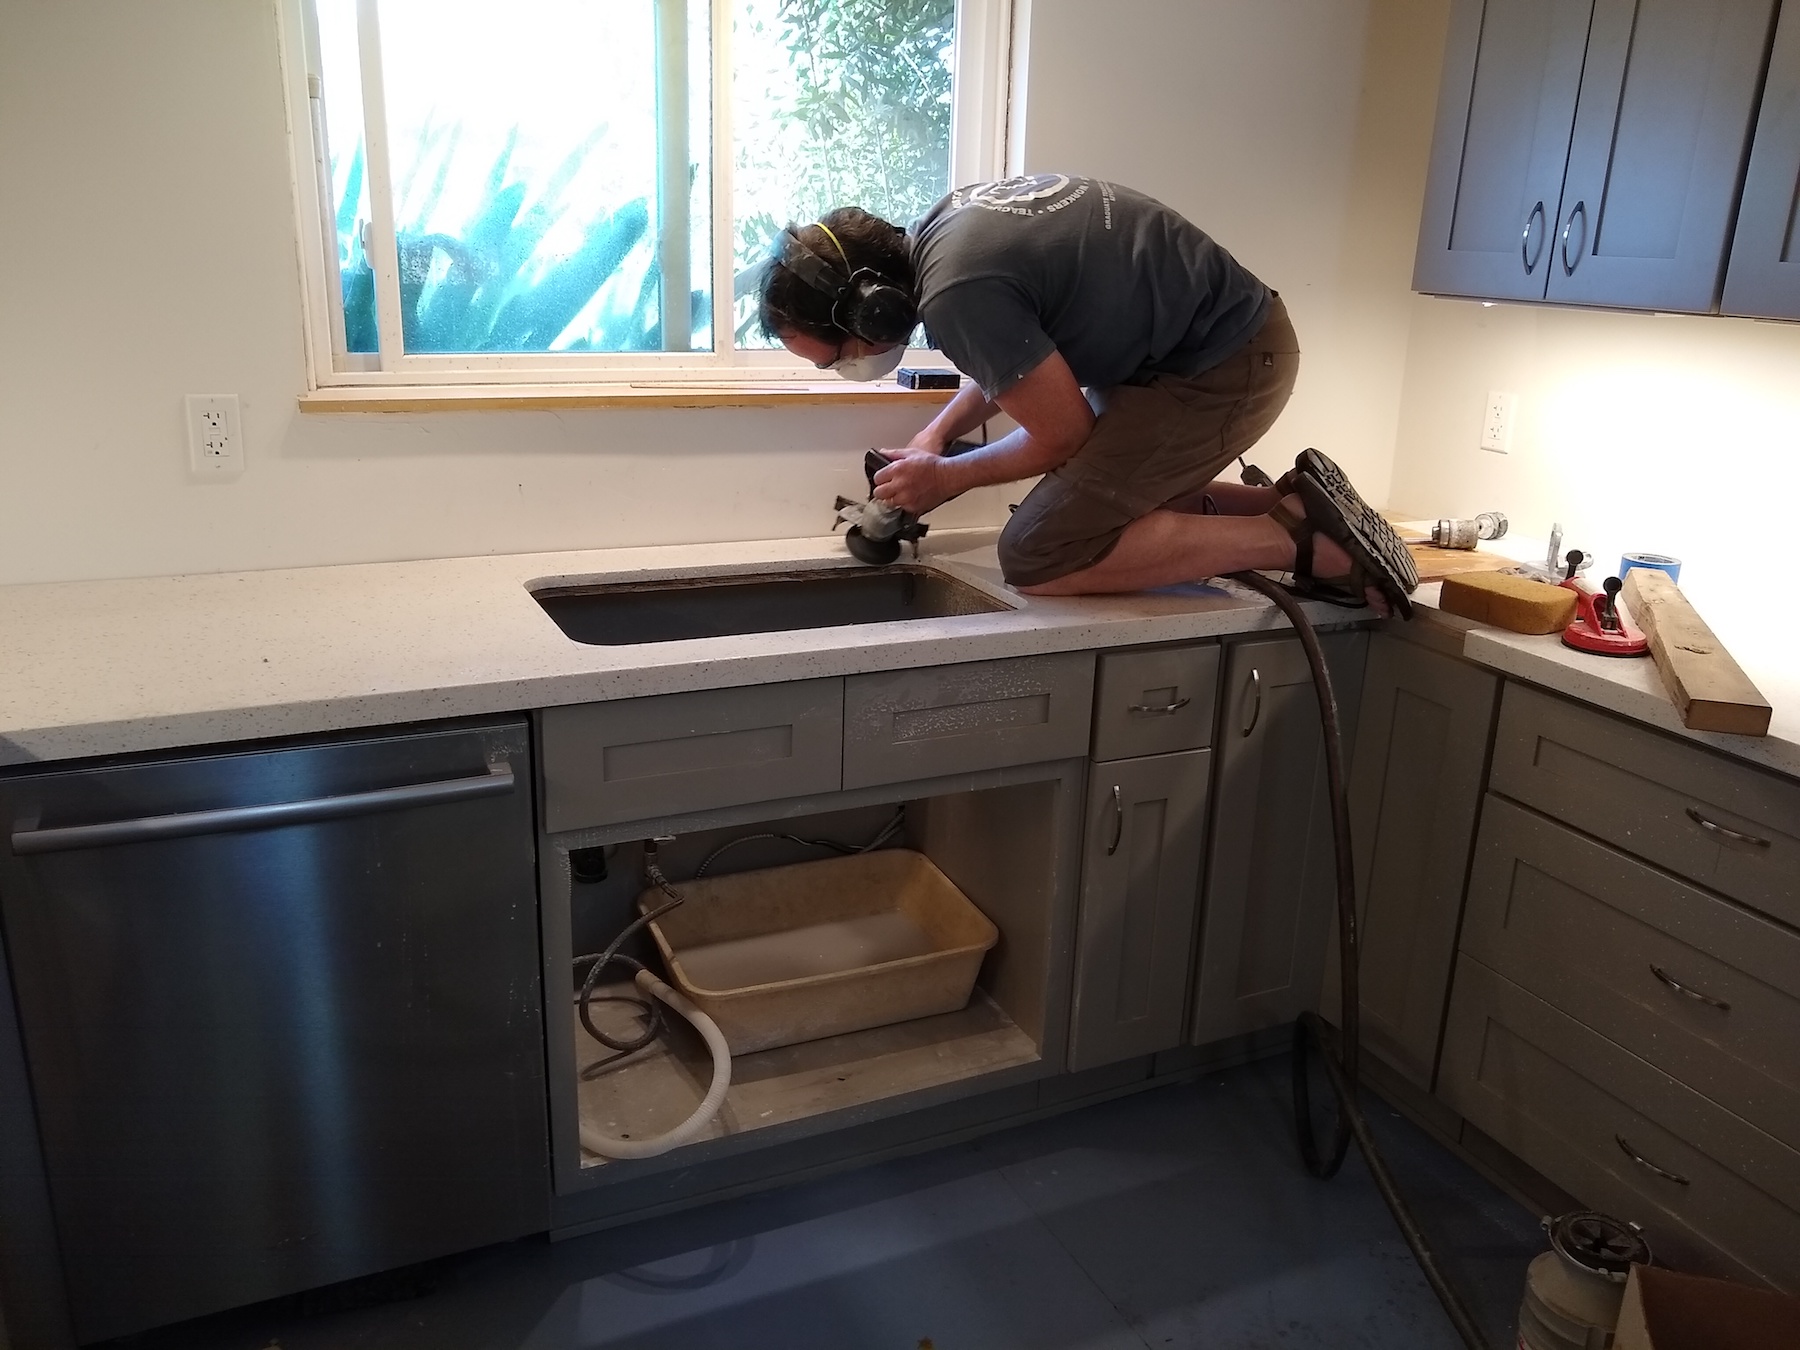
He then used a wet polisher/grinder with a diamond grinding drum to cut the edges oh-so-precisely. This took several hours and it was a huge, messy pain. But he did it!
Assembling and installing all the sink components (faucet, garbage disposer, dishwasher plumbing, etc.):
Here is the installed sink! A thing of beauty. We will never look at a kitchen sink the same way again.
As a final touch, Chris installs the backsplashes:
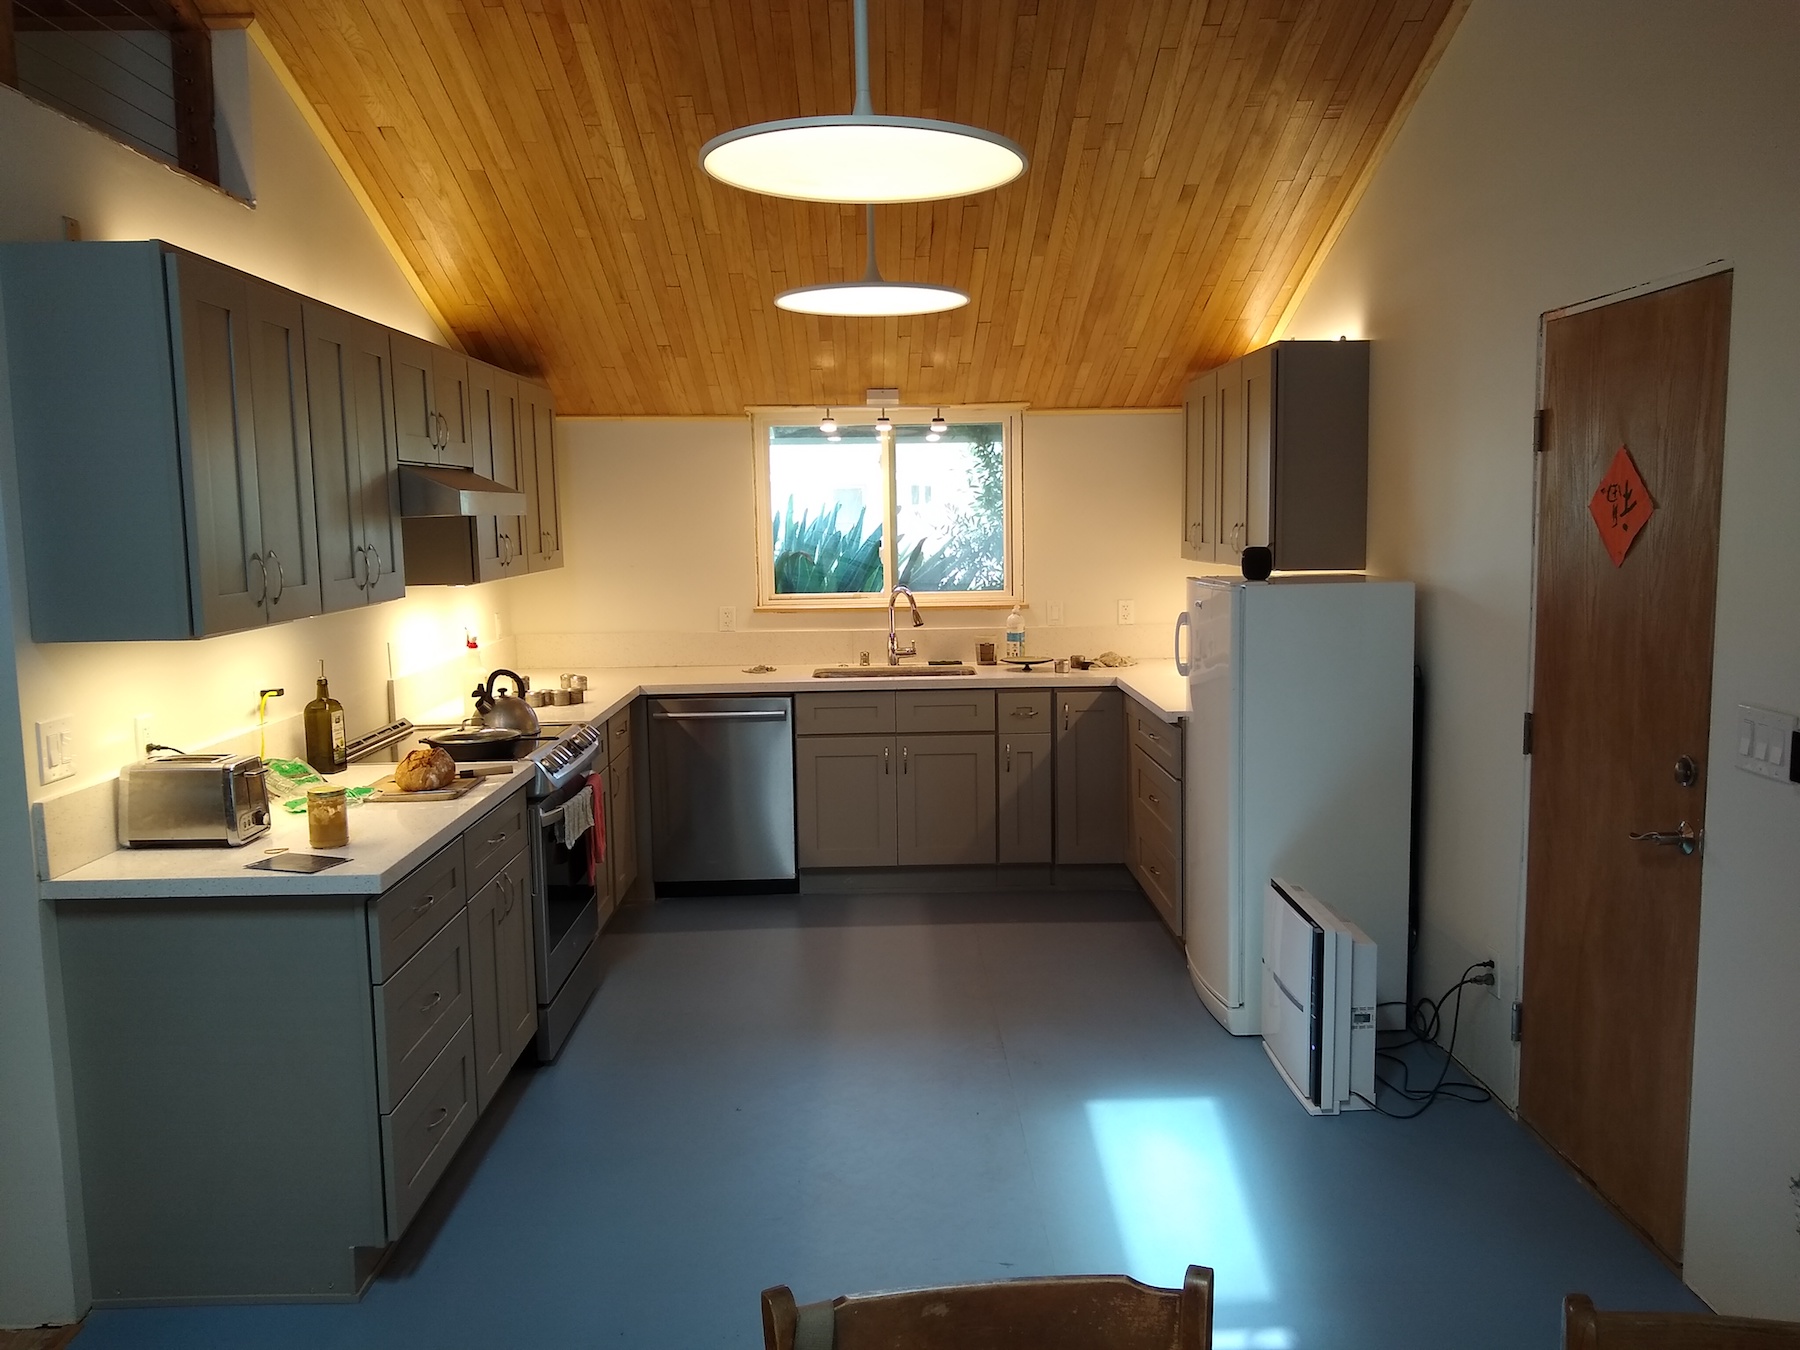
At long last… we have a kitchen! It took Chris over 2 months of hard work, but it’s the kitchen of our dreams and it looks and performs superbly.
Chris is very proud that he installed the entire kitchen himself (I’m proud of him too!), and he has learned so much in the process. Although to be honest, he’s not sure if he would ever want to DIY install countertops ever again. It probably saved us thousands of dollars in labor costs, but it was a truly exhausting and herculean undertaking.
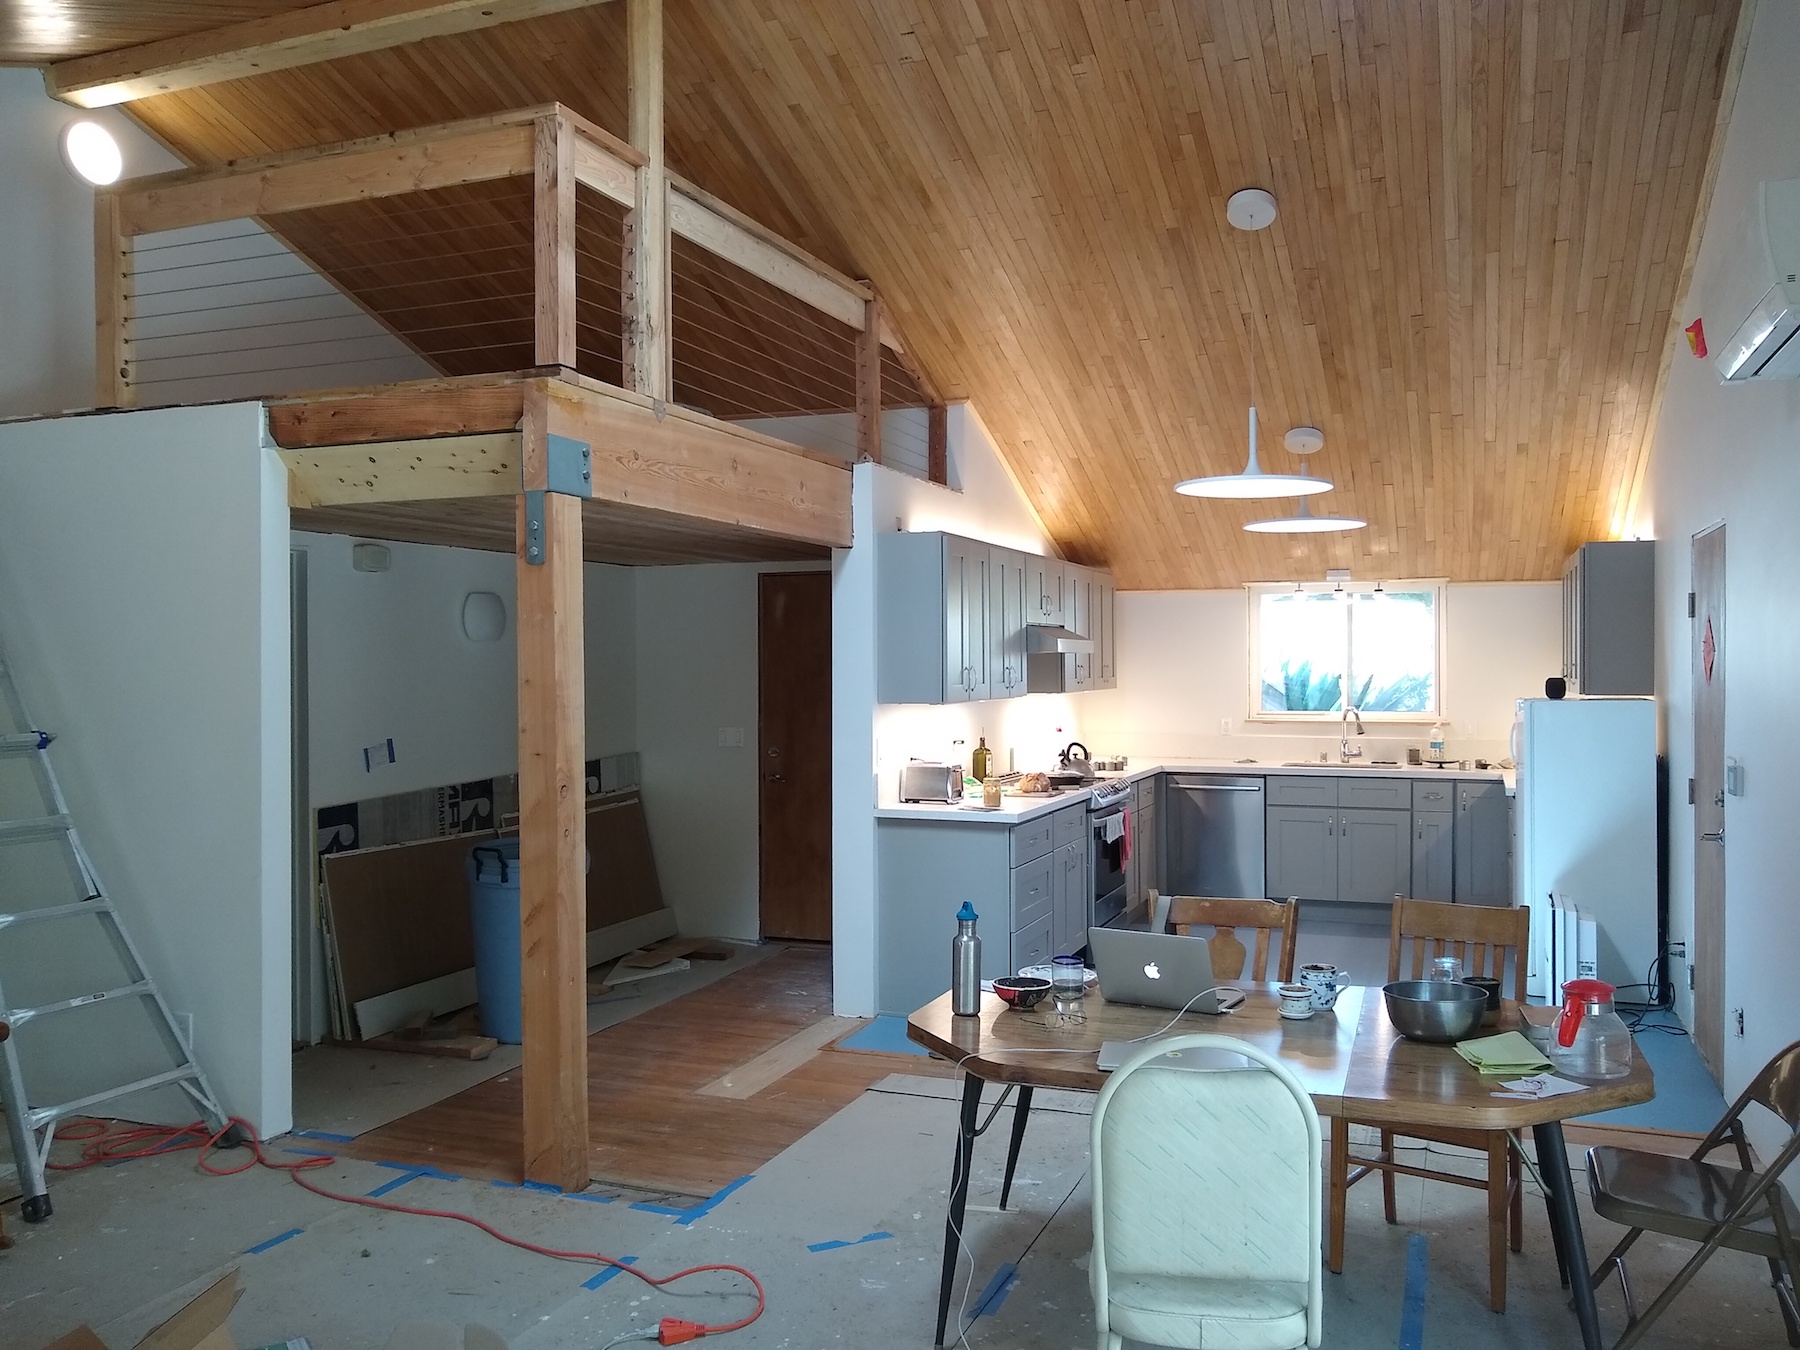
Here’s our new kitchen in context with the rest of the common area: the dining room, front entryway, and loft. This is starting to look more and more like a home!
See more epic house updates:


